Is this the cure that prevents countless hours of suffering?
“The cure to what?”, may be the first question popping into the thoughts of TPF’s readers. In this case, it is the cure to the single most complained about, biggest headache for anyone who reloads rifle cartridges. Besides the tedious task of collecting range brass and cleaning it through various means, there are many steps to preparing a spent rifle case before ever assembling a new cartridge for use.
The Steps for reloading rifle cartridges:
- Collect spent cases: Go pick up your brass and if you are lucky, everyone elses!
- De-prime cases: Can be done after step #3 depending on cleaning methods and press types
- Clean cases: Degree of cleanliness is dependant on the reloader themselves. Wipe off, dry or wet tumble, ultrasonic cleaning?
- Size cases: Full or neck only sizing is another factor dependant on the reloader’s desires.
- Trimming brass: Cutting to length and possibly chamfering inside and outside of the case neck.
- Re-prime case: By hand or by press
- Powder charge: Check the type of powder, as well as the levels in the hopper/scoop. Also do not under or over charge the case!
- Bullet seating: Make sure your OAL allows proper feeding!
- Bullet crimping: If necessary and do not over crimp!
So the biggest headache? Step 5. Trimming…
Trimming is the simple procedure in cases preparation that involves the shaving of brass down to specifications for most calibres as set out by Sporting Arms and Ammunition Manufacturers’ Institute, aka SAAMI. IF you perform step number 5, there are a huge number of methods available for an equally broad range of retail pricing. However the product on today’s TPF plate for reviewing is the Trim-It II.
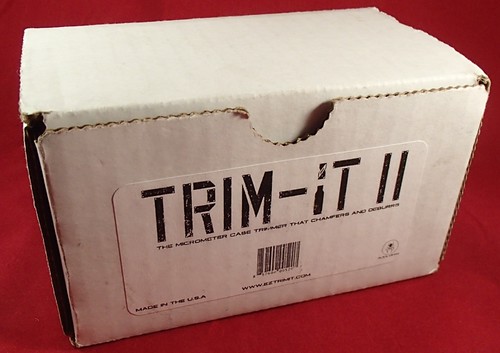
The trim-It II as packaged
Direct from the website the features of the Trim-It II are listed as:
- Built-in micrometer adjustment for cut-length control
- Interchangeable die system, allowing you to trim a wide range of cases with one unit
- Adjustable cutting tool with 3-sided carbide blade that allows for a 15 degree inside case mouth chamfer and 45 degree outside chamfer
- Machined from 6061-T6 Aluminum. This baby is built to last.
- 100% Forever (plus 90 days) Guarantee.
- Made entirely in the good ole’ US of A!
The Trim-It II that TPF obtained came is a small, compact cardboard package which contained everything needed to start trimming. OK. Almost everything… Like most reloading apparatuses, the basic unit does not come with the calibre specific components such as sizing dies and the like. This product is no different, and offers calibre specific bearing dies for many of the most common hunting calibres, pistol calibres, and some of the more popular long range benchrest calibres that are used.
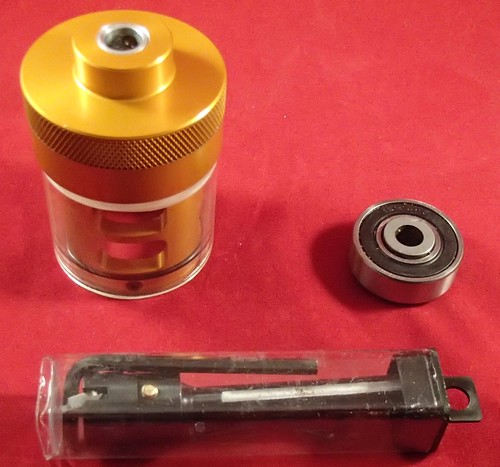
What you get in the box, plus a calibre die
The original Trim-It had a micrometer adjustable depth ability and a four bladed flush cutting head that did just that, trimmed cases to the user’s set length. The secret to both the Trim-It and the Trim-It II? The calibre bearing die. For this review, TPF-Online decided to use the ever popular .308 Winchester round for trimming. Having many, many hundreds on hand to be converted from fired brass condition into usable ammunition was just a stroke of luck as we would never just go out and discharge .308 Win by the scores just for reviewing a trimmer… OK, maybe we would… Alright… We did… And it was worth it! So lets start by explaining the components that you receive in the package when a Trim-It II is purchased… Plus the .308 Win Calibre Die.
- Instructions, 2 pages double sided
- Allen keys, 4 of varying sizes (0.050″, 1/16″, 3/32″, and 9/64″)
- The cap/barrel assembly
- 3-way cutter
- Calibre die, .308 WIN (sold separately)

Instructions:
These are likely the cheapest component of the entire set. Now these two pages seem to be simple double sided photocopies that are folded into 1/8 the original size to fit into the box. One page contains the product warranty details and a fillable sheet for returning defective/broken products. The other sheet is the one that is most important to everyone that is reading… A parts list and instructions on how to assemble, tune, and utilize the Trim-It II. The instructions for this are only on a single unfolded side and also contain the instructions for refitting the original Trim-It with the new 3-way cutting head. Opposite the instructions is a parts list diagram of both the Trim-It and Trim-It II.
Allen Keys:
The L-shaped hex drivers for adjustments and locking in components with set-screws. You knew this already however, so not going to say any more on these parts…
Cap/Barrel Assembly:
So the cap serves two purposes, both of which are important for the functionality of the Trim-It II. First is the mount for the 3-Way Cutter that is secured along the cap’s centreline with a set screw. This forces the cap to rotate with the cutter when under power. The second purpose is to act as the threaded mount for the barrel part of the assembly. The barrel houses the Calibre Die, and because it is threaded into the cap, allows for fine distance adjustment for cutting brass to the proper overall length. The barrel has numerous openings which allow adjustment to the cutting head as well as a path through which trimmed shavings can be removed. The barrel has an external o-ring groove which holds the clear polycarbonate sleeve in place to prevent shavings from flying everywhere when in use. A set screw locks the barrel depth into place as well as locking the calibre die into its groove.

The miniature boring head with carbide insert
3-Way Cutter:
The three way cutter is a miniature version of a milling machine’s adjustable boring bar. The cutter insert itself is a simple triangular insert whose corners have been cut to a V shape to trim both inner and outer chamfers and thereby also the length of any brass casing. TPF-Online did not remove the insert, but the V shape is on all three corners of the insert meaning that if you even wear down one of the cutting profiles, you can rotate and have a new cutting profile to be used. Twice… Since these are only trimming brass versus the insert’s carbide, it is likely to last for generations of shooters. The mounting head of the cutter is adjustable itself, with the insert able to be shifted towards or away from the centerline of the cap/barrel. This allows for different diameter necks to be trimmed, but unless you have several of the cutters pre-set, re-adjusting the cutter for each new calibre introduced is required.
Calibre Die:
These are sealed bearings that are modified by machining a custom inner ring to accurately position brass for trimming. These are precision tolerance bearings which are aligned by the barrel groove machined to exacting tolerances. with the outer ring of the die secured with a set screw in the barrel, the inner ring is free to rotate independently of the cap/barrel/cutter assembly.
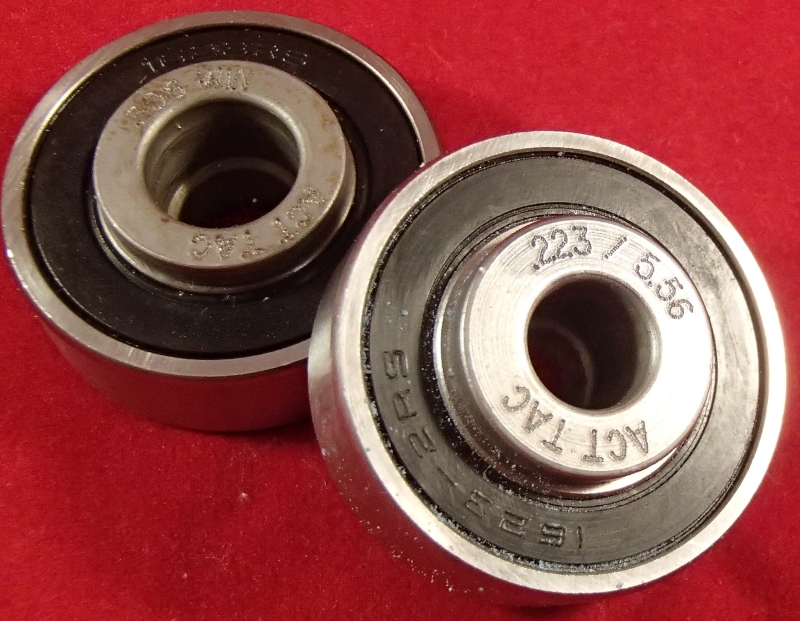
A .223/5.56 and .308 examples of Calibre Dies available
How it works… Aka steps for using the Trim-It II:
- Install the 3-way cutter into the cap/barrel assembly so that it is as close as possible to the cap and secure with set screw against the flats in the shaft of the cutter.
- Tighten barrel into cap until it stops (“Zero”) back off until you alight the barrel index line with one on the cap. Unscrew barrel for one full revolution and lock in place with a set screw.
- Insert desired calibre die into place in barrel and lock it with set screw.
- Insert desired brass piece into calibre die.
- Loosen cutter set screw and move cutter until it touches neck of brass. Re-tighten setscrew.
- Slightly loosen cutting head set screw and adjust the position of the carbide insert so that the neck edge will touch the base of the V shape cutout on the insert. Re-tighten cutting head set screw.
- Loosen barrel set screw and adjust for height. Re-tighten. Each mark on the cap equals 0.002″ travel.
- Install into a drill, drill press, dedicated rotary tool, etc… Ensure the drill turns clockwise, otherwise cutters will not work properly.
- While drill is running, insert brass case into calibre die. If not trimmed to the right length shut down and adjust barrel as per Step 7.
- Go trim happy… When you don’t hear the inserted brass being trimmed, time to put in the next piece.
It is a lot of work for setting up the Trim-It II, but once the tool is setup, the unit is spectacularly fast in doing it’s job. For those who only have a hand drill however, the entire setup will be hard on the hands.
Pros:
- Fast once setup
- Nearly forty calibres available
- Easily adjusted for OAL
- Ease of cleaning due to the polycarbonate sleeve
- Rock solid
- High quality
- Not expensive like a GTC Giraud Power Trimmer
Cons:
- Adjusting the V-notch could be easier to tune
- Hard on hands if using a hand drill
- Handheld brass case tries to spin while cutting
- Not cheap like a Lee Zip-Trim
Recommendations:
- Table top drill press, or dedicated drive unit for the Trim-It that allows for two hands to manipulate and hold brass.
- Design change for the carbide insert adjustment. Use a fine thread screw for adjusting distance from centre line.
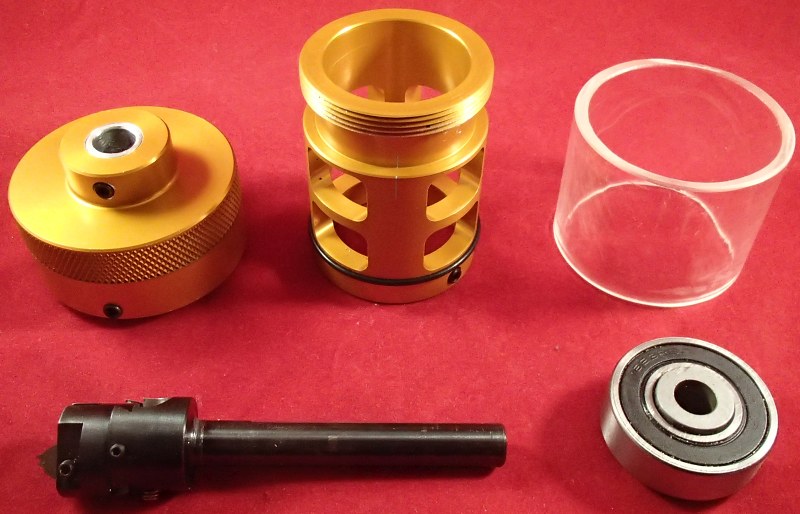
The components ready for assembly and adjustment. Soon to be followed by copious volume brass trimming…
The Trim-It II as reviewed is available from brick and mortar store locations such as Select Shooting Supplies in Cambridge, Ontario. Their listed prices are, at the time of this review, $189.95 CAD for the Trim-It II, and $29.95 CAD for each calibre die. Is the Trim-It II a worthy addition to one’s repertoire of reloading tools? Does it fall under the category of Tactical, Practical, or Fantastical devices for firearms owners? That is a simple question that only YOU, the reader can answer.
TPF-Online wishes to thank Mr. Chris V. for his comments and additional input on this review. Between his efforts and those of TPF-Online, nearly 2000 pieces of .308 Win brass was trimmed in very little time.

Leave a comment